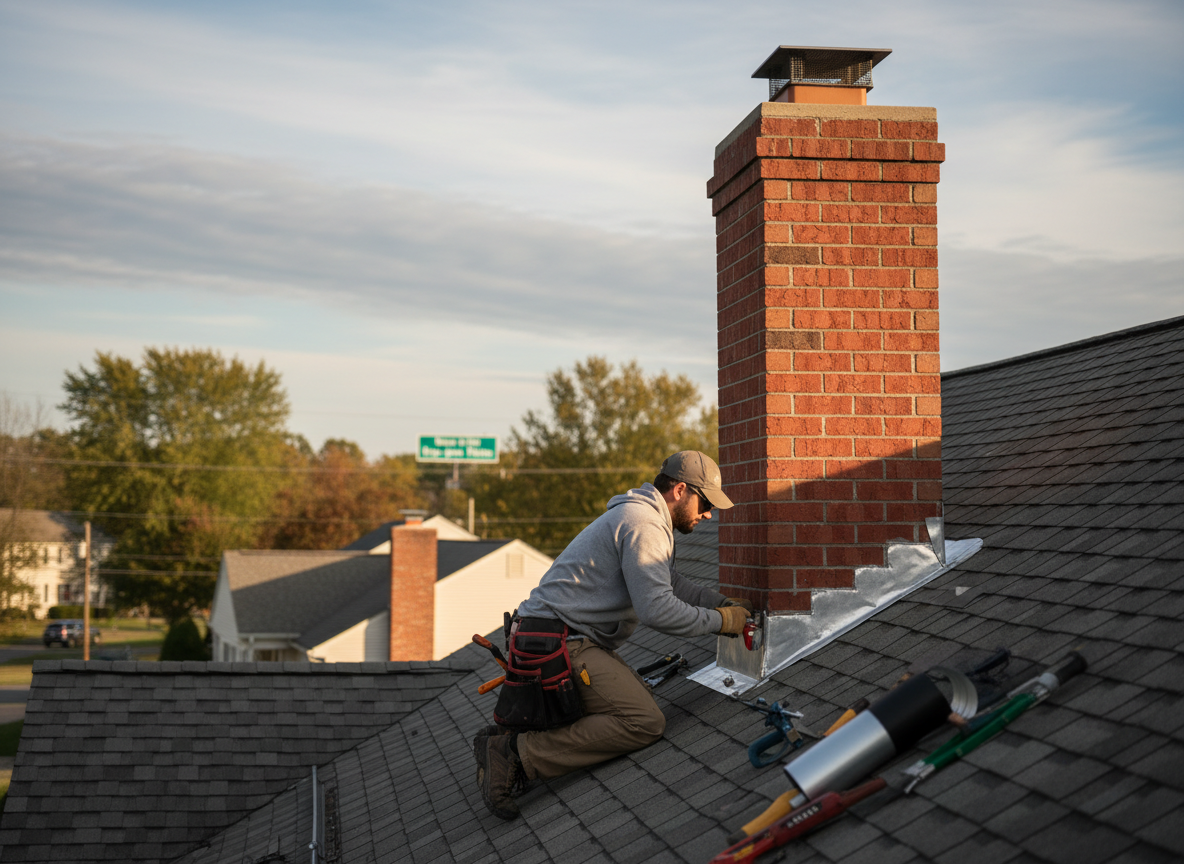
Chimney flashing repair addresses the metal or step flashing where the chimney meets the roof deck. In Parsippany-Troy Hills split-level and colonial homes built from the 1960s onward, original flashing often fails at the counter-flashing joints after repeated freeze-thaw cycles. We remove deteriorated sections, clean the reglet in the masonry, and install new copper or lead-coated copper step flashing that ties into existing shingles without disturbing the roof plane. Edge cases include chimneys on the downhill side of sloped lots where meltwater pools against the base, requiring cricket installation to divert flow.
Proper counter-flashing depth and sealant choice matter because many local homes have brick chimneys with soft mortar that cracks when over-driven fasteners are used. We inspect for hidden deck rot by lifting shingles two courses up from the chimney and check the cricket angle on gable-end chimneys common in the Lake Hiawatha section. Code requires flashing to extend at least 6 inches up the chimney and 4 inches under shingles; we document existing conditions before work begins so homeowners can see why partial repairs often leak again within two seasons.
Homeowners in Parsippany-Troy Hills frequently mistake interior ceiling stains for a simple liner issue when the real source is failed step flashing at the rear of the chimney. We always verify the cricket is present and correctly angled before closing the job, because missing or undersized crickets on the north-facing roofs that catch the heaviest snow load are a recurring local problem.
Technician insight
In Parsippany-Troy Hills, the thing that catches most people out with chimney flashing repair is how split-level homes on the slight grades common around Waterview Boulevard trap meltwater against the chimney base during March thaws, rotting the deck two feet back before any interior stain appears.
Rear Chimney Leak on a Lake Hiawatha Split-Level
Water stains appeared on the second-floor ceiling after a heavy February melt. We found the original lead flashing had pulled away at the rear corner where the roof pitched toward the chimney. We removed the old flashing, replaced the rotted deck section, installed new copper step flashing with an added cricket, and restored the shingles. No further leaks occurred through the next winter.
How it works
- 1
Site Inspection
We examine flashing condition, cricket presence, and any rot at the roof deck from both inside and outside the home.
- 2
Old Flashing Removal
Deteriorated step and counter flashing are carefully extracted without damaging surrounding shingles or masonry.
- 3
New Flashing Installation
Copper or lead-coated copper step flashing is fitted into the reglet, sealed, and integrated with existing roofing layers.
- 4
Final Check And Documentation
We test for proper water shedding, photograph the completed work, and note any additional masonry concerns for the homeowner.
Pricing
Upfront quotes provided after inspection; cost varies with access, material type, and extent of any deck repairs needed.